Hot Cacao (For One)

IMG_0172


Some days, you need a treat. The weather has been cold for too long, the sun is shining for the first time in days and you know it won’t last so you try to soak in every ray, and you need something warm to wrap your hands around while you sit in an awkward spot on your dining room floor because it gets the best sun. This is life.

It’s great.

Also great? This hot chocolate. It’s full of good ingredients, takes just a few minutes on the stove to be complete, and is best served in one of your favorite mugs, hopefully with a really good memory attached to it. I chose the mug we bought on our honeymoon in Scotland. It gives me all the good feels.

Mix and match the ingredients of the drink. Switch out for whatever milk you like. Taste and add more sweetening if you like it super sweet. It should make you happy.

Hot Cacao

  • Roughly 1.5 c. milk of choice (I filled my mug with homemade coconut milk and poured it into the pan)
  • 2 tsp. raw cacao powder
  • 1 Tbsp maple syrup, or to taste
  • Small pinch of sea salt
  • 1/2 tsp. maca (optional)

Whisk together the ingredients in a small saucepan over low heat, until lightly simmering. Pour into a pretty mug. Done.

Pineapple Mint Water

photo (22)

It’s a funny thing, writing a blog and seeing which posts become the most viewed.

One of my top posts? It’s not even a recipe. It involves no cooking, and it’s just throwing stuff into a bottle of water. It’s almost like writing up a recipe for ice cubes, but a little more flavorful. It’s for strawberry mint infused water, and it’s delicious.

While it is comical to call it a recipe, it is something that we’ve enjoyed a lot this summer, so I thought I’d add a new variation. Brace yourselves.

Pineapple Mint Water

  • The core of a pineapple, quartered
  • A handful of fresh mint
  • Water

Combine all of these ingredients in a large jar and refrigerate for at least two hours. The longer you let it sit, the more pronounced the flavor will be.

Strain and serve.

Keep refilling the bottle with water as you drink it, until the flavors start to fade or the mint starts to look too sad.

Sour Cherry Smash

photo-3 copy 3

I am so happy with all the of the produce that’s finally showing up at our farmers market. The fruit has been especially exciting, so when I saw sour cherries last weekend, I grabbed them. Then proceeded to eat a least half of them alone that night.

While I was inhaling said cherries, I decided that a few should make their way into a cocktail. Gin seemed like the right choice, and the result was a delicious (and stiff!) summer drink. Also, it’s pretty, which counts for a lot.

Sour Cherry Smash

  • 6 sour cherries, pitted, plus another for a garnish
  • 1-3 tsp granulated sugar (this amount varies a lot based on just how sour the cherries are)
  • Juice of 1/2 a lemon
  • 2 oz gin

In the bottom of a cocktail shaker, muddle together the cherries and sugar until the sugar has dissolved. Taste and adjust sweetness to your preference. Add the gin and lemon juice, fill the shaker with ice, and shake well until chilled and well mixed. Strain into a glass with ice. Garnish with a cherry.


Strawberry Mint Water

photo 1 (1)

So one of the links I wanted to eat last week was this little post from Food52 about infusing water with the cut off tops of strawberries. I loved the idea of finding a use for something that is typically discarded, and it was kind of a no lose situation. The worst that could happen is that it would taste gross and I’d be throwing out something I was going to throw out anyway, and wasting a little water.

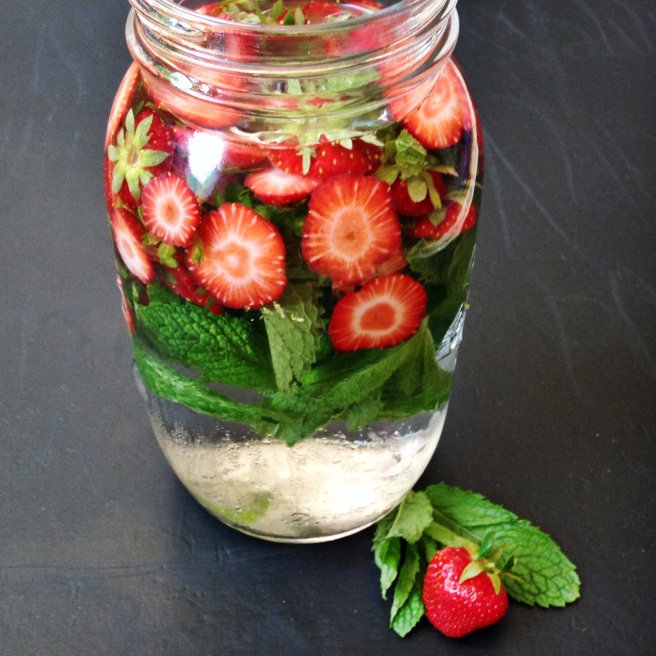
I threw the (well cleaned!) strawberry tops into a half gallon glass jar as I was prepping for our lunches this week. I also had some leftover mint on hand, so I put a small handful of that in as well. Then I filled the jar to the brim with filtered water and stuck it in the fridge for a few hours.

Once I thought it had been in there long enough, I poured some through a fine mesh sieve into a glass because I didn’t want any leaves or strawberry seeds in the water.

This is seriously so delicious that I can’t believe I haven’t been doing it for years. Think of all the wasted strawberry tops! The mint added a really nice touch too, so I would really recommend adding some if you have any. I bet basil would also be delicious.

Am I the only one who didn’t realize how amazing infused waters are?

Strawberry Mint Water

  • Cleaned strawberry tops
  • Water
  • Mint (optional, but highly suggested)

Simply combine all of the above into a container place in the fridge for at least 2 hours; longer if possible.  The water will turn a lovely shade of pale pink after a while, which would be so pretty for a party.

Strain and serve.

I’ve successfully added more water quite a few times, but probably 2 days would be the longest I’d go before I straining out the strawberries. They start to lose their color and flavor over time.

Lazy Mint Julep

afterlight-2 copy 2


Southern purists, look away: this is my most commonly consumed form of mint julep. I know it’s a travesty to call it but that name, but it still has the key elements: bourbon, sugar, and mint. Instead of muddling and all that though, this simply requires mixing a mint infused simple syrup with some bourbon (we prefer Four Roses for everyday). Simple as that.

It’s what summer drinks were meant to be.

Mint syrup

  • 1 cup of sugar
  • 1 cup of water
  • Several sprigs of mint

Bring the water to a boil in a small saucepan. Add sugar and stir until dissolved. Add the mint and boil for one minute. Turn off the heat and let the mint steep in the syrup for about half an hour. Remove the mint and store in a glass container in the fridge.

Lazy Mint Julep

  • 3 oz bourbon
  • 1 oz mint syrup

Pour the bourbon and mint syrup in a glass (or a fancy mint julep cup). Stir well to combine. Add ice and a sprig of mint if you have one.

Cheers!


Homemade Coconut Milk

Coconut Milk

Minerva really wanted to try this coconut milk, but since I prefer to have it fur free, I kept the lid on.

Josh is allergic to nuts and dairy, which really limits the “milk” options for us. While I still use cow milk in my coffee, and for occasional recipes when we just really don’t feel like substituting, we need something to put in smoothies and baked goods, or really whatever. I don’t like to use soy, I find rice milk a little bland, and it seems like most of the cartons of coconut milk available have added ingredients that are just unnecessary and weird me out.

This technique creates a smooth, lightly creamy, and slightly sweet coconut milk with a definite coconut flavor.

Now, this isn’t the coconut milk to use in curries or anything like this. This is definitely a drinking milk, so keep that in mind when substituting it in recipes.

I make a batch of this every Sunday and throw out any leftovers the following weekend. I find that a week is about as long as it’s good for.

It would be great with granola!

Coconut Milk

  • 3 cups unsweetened shredded coconut
  • 6 cups water
  • Nut milk bag or fine mesh strainer

Place the coconut in a large bowl. Heat the water to a boil and pour over the coconut. Let soak for about half an hour to an hour.

Once it has soaked and cooled down a little, place about half of the water/coconut mix into a blender and blend for 2-3 minutes. Pour the blended mixture into the nut milk bag placed over a bowl. Squeeze the bag until you get all of the liquid out of the coconut. Discard the coconut pulp and repeat with the remaining coconut and water. If you’re using a strainer, pour through the strainer and gently press to get as much of the milk out as possible.

Pour the strained milk into an airtight container and store in the fridge for up to a week. Shake well before using.